
How to Film Yourself for Instagram for the First Time
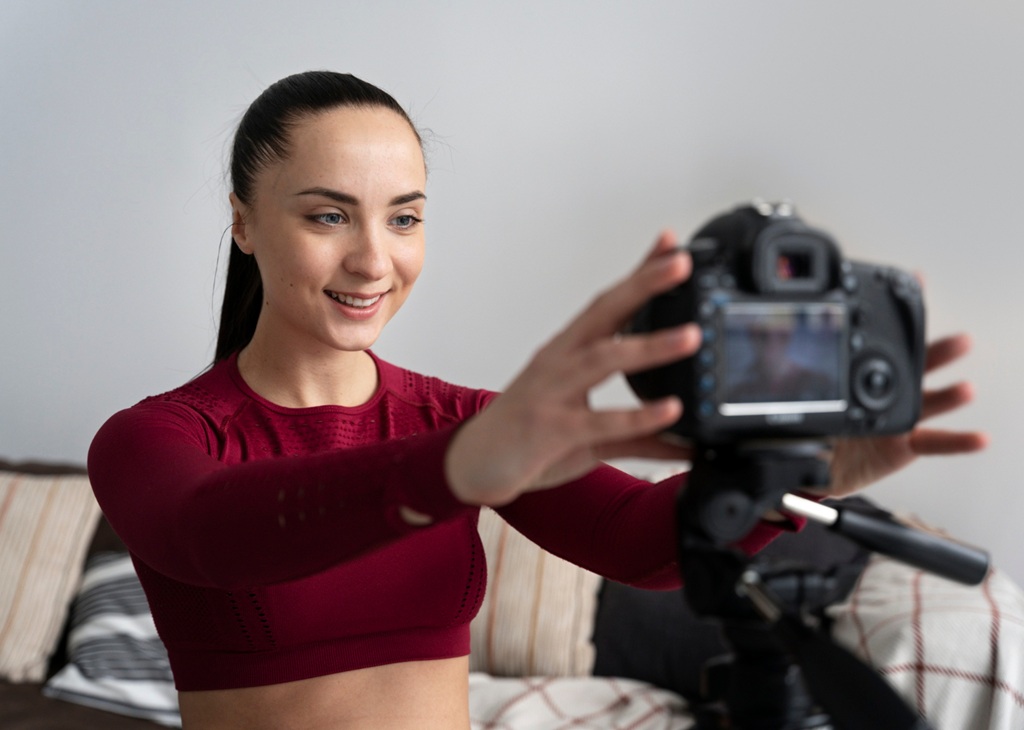
Why Filming Yourself Feels So Awkward at First
Most people freeze the first time they point a phone at their own face. Suddenly, your voice sounds strange and your hands don’t know where to go. That reaction is normal, and it doesn’t mean you’re bad at video. In fact, almost every creator you admire felt the same way at the start. The good news is that you can learn to film yourself for Instagram with a few simple steps. First, it helps to understand why the experience feels so uncomfortable. Your brain isn’t used to watching you from the outside. As a result, small flaws look huge, and every pause feels endless. However, your audience doesn’t see you that way. They simply see a person who shares something useful, and they rarely notice the details that bother you.
Getting Comfortable on Video Is a Skill
Many beginners assume confidence on camera is a talent that some people have and others lack. Instead, it works more like a muscle that grows stronger with regular use. Each time you record, the process becomes a little more familiar. Over time, the nervous feeling fades because your brain learns there’s no real danger. For example, a creator who records one short clip a day for two weeks usually sees a clear change. Their speech slows down, their face relaxes, and their message becomes easier to follow. Therefore, don’t judge your ability by your first attempt. Treat it as a starting point rather than a final verdict. Also, remember that nobody has to see your early practice clips. You can record, watch, delete, and try again as many times as you like.
What Instagram Rewards
So why push through the discomfort of filming yourself for Instagram at all? The answer is simple: Instagram gives real weight to video. Reels, Stories, and live broadcasts all put a face and voice in front of your followers. As a result, people feel they know you, and that sense of connection builds trust. Faceless content can still work, of course. Still, accounts that show a real person often earn more comments, saves, and direct messages. Moreover, video lets you explain ideas faster than a caption can. If you want to grow a brand or a business, the ability to film yourself for Instagram gives you a clear advantage. In short, the effort you put in now can pay off for years. The next step is to prepare a space that makes recording easier.
Setting Up Your First Recording Space
You don’t need a studio or expensive gear to start. In most cases, the phone in your pocket already shoots better video than cameras from a decade ago. What matters more is the space around you. First, pick a quiet spot where you won’t be interrupted for at least twenty minutes. Next, look at the background behind you. A clean wall, a tidy bookshelf, or a simple plant works well. On the other hand, a messy room pulls attention away from your face. Also, check for mirrors or windows that might reflect the phone. Once you find a spot you like, try to use it every time. That way, your videos look consistent, and you won’t waste energy on new decisions before each session.
Light That Flatters Your Face
Lighting has a bigger effect on video quality than almost any other factor. Fortunately, the best light is often free. Sit facing a window during the day so soft natural light falls on your face. However, avoid direct midday sun because it creates harsh shadows and makes you squint. If you record at night, a simple ring light or desk lamp can do the job. Place the light slightly above eye level and in front of you. By contrast, light from behind you turns your face into a dark shape. For this reason, never sit with a bright window at your back. Before you record, take a quick test clip and check whether your eyes and skin look clear. Then adjust your position until the image looks natural.
Sound and Stability
Viewers will forgive slightly soft video, but they rarely forgive bad audio. Echoes, traffic noise, and a humming fan make people scroll away fast. To reduce echo, choose a room with carpet, curtains, or soft furniture. In addition, move closer to the phone so its microphone picks up your voice clearly. Later, you might buy a small clip-on microphone, but it isn’t required at first. Stability matters too. A shaky frame looks distracting and can even make viewers feel dizzy. Therefore, set your phone on a cheap tripod or lean it against a stack of books. Also, keep the lens at eye level rather than below your chin. This basic setup is enough to film yourself for Instagram with a clean, professional look.
Planning What You’ll Say
Once your space is ready, turn your attention to the message itself. Many first-time creators hit record without a plan and then ramble. As a result, the video runs long and the main point gets lost. Before you start, decide on one clear idea for the clip. For example, you might share a single tip, answer one common question, or tell a short story. Then think about who will watch it. A beginner audience needs plain language, while experts may want more detail. Also, keep your first videos short. Aim for thirty to sixty seconds so the task feels manageable. After all, short clips are easier to plan and edit, and they’re easier for your followers to finish. Later, you can stretch into longer formats.
Simple Talking Points
A full word-for-word script can make you sound stiff, especially at first. Instead, write three or four short talking points on a sticky note or in your phone’s notes app. Start with a hook that tells viewers why they should stay. Next, add the main idea and one supporting example. Finally, close with a clear call to action, such as a question for the comments. For instance, a fitness creator might open with a common mistake and then show the fix. After that, they could ask viewers to share their own struggles. Keep each point to a few words so you can glance at it quickly. That way, you’ll sound natural while you still stay on track. Moreover, this format works well for Reels, Stories, and longer videos alike.
Getting Comfortable on Video Through Practice
Before you record the real take, run through your points out loud a few times. At first, practice without the camera so you can focus on the words. Then turn the camera on and do a test run you don’t plan to post. This step removes a lot of pressure because nothing is at stake. Watch the test clip and notice one or two things to improve. For example, you might speak too fast or forget to smile. However, don’t try to fix everything at once. Instead, pick the biggest issue and adjust only that on the next attempt. Consequently, each round feels easier, and your confidence builds step by step. This small habit is one of the easiest ways to film yourself for Instagram without feeling overwhelmed.
Setting Up Your First Recording Session
Now it’s time for the real recording. First, clear your schedule so you don’t feel rushed. Silence your phone notifications, because a pop-up alert can ruin a perfect take. Next, check your battery and storage space so the camera doesn’t stop halfway. Then set your framing. Usually, the best frame shows your head and shoulders, with a little space above your head. Keep your eyes roughly one-third of the way down the screen. Also, choose the vertical format for Reels and Stories, since that’s how most people watch. If your phone has a grid overlay, turn it on to help with balance. Finally, take a deep breath before you tap record. A calm start sets the tone for the whole clip.
Eye Contact and Energy
On camera, the lens acts as your viewer’s eyes. So look directly into the lens rather than at your own image on the screen. This feels odd at first, but it creates a strong sense of connection. To help, you can place a small sticker next to the lens as a reminder. In addition, raise your energy slightly above your normal level. The camera tends to flatten emotion, so a relaxed tone can come across as bored. Smile when it fits the topic, and use natural hand gestures. Meanwhile, sit or stand up straight so your voice carries well. If it helps, picture a friend on the other side of the lens. When you speak to one person, you’ll film yourself for Instagram in a warmer, more personal way.
Handling Mistakes and Retakes
Mistakes will happen, and that’s perfectly fine. You might trip over a word, lose your place, or hear a dog bark in the middle of a sentence. When that happens, don’t stop the recording right away. Instead, pause, take a breath, and start the sentence again. Later, you can cut out the error during editing. This approach saves time because you won’t need to set up a brand-new take. Also, give yourself a limit, such as five attempts per clip. Otherwise, you may chase perfection and never post anything. Remember that small flaws often make a creator feel more human. In fact, many viewers prefer a relaxed, real delivery over a polished one that feels scripted. So keep going, even when a take isn’t perfect.
Getting Comfortable on Video After You Post
After you finish recording, watch the clip once from start to end. Try to view it as a follower would, not as a harsh critic. Ask yourself whether the main point comes through clearly. Then do some light editing with Instagram’s built-in tools or a free app. Trim the dead space at the start and end, and add captions for people who watch without sound. Next, write a short caption and post the video. Of course, the first upload may feel scary. However, the fear usually fades once you see a few kind comments. Afterward, check the replies and reactions without obsessing over the numbers. Early results say more about practice than talent, so focus on progress rather than views.
Setting Up Your First Recording Routine
One video won’t make you a confident creator, but a steady routine will. Therefore, choose a schedule you can actually keep, such as two short clips per week. Pick specific days and times so recording becomes a normal part of your week. In addition, keep your setup ready to go. When your tripod, light, and background stay in place, you remove a major excuse to skip a session. You can also batch your work. For example, record three clips in one sitting and post them over the next several days. As a result, you’ll build a content buffer and reduce stress. Over a few months, this routine will make it second nature to film yourself for Instagram whenever an idea strikes.
Growing Beyond the First Clip
As your skills improve, you can start to experiment the way you film yourself for Instagram. Try new formats, such as tutorials, behind-the-scenes clips, or quick answers to follower questions. Later, you might go live and chat with your audience in real time. Similarly, you can test different angles, locations, and editing styles to see what fits your brand. Keep track of which videos get the most saves and comments. Then use those insights to guide your next ideas. Above all, stay patient with yourself. Every creator starts with awkward first clips, and the ones who grow are simply the ones who keep going. So set up your phone, pick one idea, and press record today. Your future audience is waiting to meet you, so don’t keep them waiting long.
VerifiedBlu is a great resource for growing your Instagram followers organically and authentically. Contact us to talk about how we can help.
